Update 4/2– Garam Masala, Candles and Soap

For the most part I have been focusing on spending time with my family and healing.  Every little moment seems to matter so much more.  It feels so good to just be able to cook a meal or spend time relaxing with my DH, I can’t even tell you.  Things I might have taken a bit for granted just a month ago.

One of the interests I’ve entertained myself with is spices.  Or rather, spice blends.  There’s been several but I’ll tell you about my favorite one.  I was liking  paneer (cheese) so much (both the making and the eating) I started diving into Indian Cooking blogs and Indian-fusion sorts of recipes for other dishes that included or complemented it.  Of course then I needed garam masala (lit. “hot mixture”), which I haven’t found locally.  So I took to making my own from the items I easily had on hand.  Eventually I will use whole spices as fresh and local as possible, roasted and/or ground myself to match the quality and freshness of the homemade paneer, but for now, after several attempts, our favorite quick mix is this:

Mix equal portions of ground cinnamon, coriander, ginger, and cayenne pepper.  Add a double portion of ground cumin.  Add a half-portion each of ground black peppercorns, cardamom and all-spice.  Store in a glass jar or other airtight container in a cool, dry place.

IMG_3653Naturally, then, when a friend shared their abundance of fresh, baby spinach I turned to Indian Fare.  I’d bookmarked several spinach and potato dishes that reminded me of a dish I’d enjoyed back when I lived in Arizona and combined them to produce what I was looking for.  The results turned out so delicious I’ve made them several times in the past two weeks!  The closest recipe is here.  The changes I made are that I used my processor to do the grating.  I cooked the spinach along with four large potatoes, peeled and diced, in a large skillet with minimal water and a lid (to get the potatoes cooked quicker with less water).  I also added a grated carrot, a clove of minced garlic, salt, pepper and a few sprigs of fresh parsley to the spinach and potato mixture (it all gets blended up together at the end).  I omitted the cayenne but instead used 2 tsp. of my garam masala spice mix.  And I used sour cream instead of evaporated milk.  The best way I’ve ever served spinach – hands down!

Since the last update I’ve also completed two exciting indoor craft projects with my Dear Husband I want to share.  Candles and Soap.

With the candles we were able to perfect our mix, method and container/wick widths to get a pour we like and can predict.  They burn clean, even and slow with a gentle pear scent. Next time we will use a bit shorter jar.  These are 20-hour candles.  I really wish you could smell them:

IMG_3634 (768x1024)

DH and I had planned our soap adventure for awhile now, but like many things lately it needed to be postponed.  We were spurred into action by a request from a friend for all-natural, lemon guest soaps.  Thus, these lemon bars were born:

IMG_3692 (1024x768)


Our soap is a blend of organic goat milk, vegetable glycerin, coconut oil and soy protein.  Natural iron oxide powder produces the yellow color.  Light use of lemon essential oil (5X) provides the desired properties and scent.  It wasn’t as much work as we anticipated and the results were definitely worth it. I think we’ve been bit by the soap-making bug…our list of ideas to try is growing!

Given all the possibilities I don’t know that lemon would have ever placed among my picks, but I already plan on making more for myself when my own sample runs out!  Even though we kept the scent on the fainter side of things, there is something just perfect about the rejuvenating pick-me-up of the lemon when I wash my face in the morning!

Weekly Update – 3/8

I suppose my weekly update should rightfully be called a monthly update.  I can’t believe we’re all the way back to the Full Moon again, now in Virgo!

Not to be too heavy, but since the last time I posted I was diagnosed with a rare sort of cancer and have had surgery to remove the singular tumor.  I spent a week away from most of my family at a large hospital two hours away and am still at the beginning of the recovery-phase.  It has all happened very fast, but the prognosis is good.  I am feeling both “lucky" and well-loved.

I made the decision to go ahead and mention this here because DH and I are convinced it would have all been terramin labelmuch worse, and perhaps more similar to what we were told to expect, if it wasn’t for a product called Terramin Clay (Calcium Montmorillonite).  This is because we had originally been operating under the presumption that I had a cyst which ruptured beneath my skin and my research was for natural home remedies to draw-together and pull-out an infection of this sort.  I initially tried a daily compress of Epsom salts and later a compress of wool-felt soaked in cold-pressed castor oil (i.e. “the Edgar Cayce Remedy”), which may have added to my results.  However, we didn’t notice dramatic changes until the Terramin.

Based on what I read about the clay I started ingesting a teaspoon mixed into 8 oz. of water or orange juice every morning.  I much preferred the taste of it when mixed with orange juice, but mixing the fine powder with water allowed me to brush my teeth with the remaining “grit” in the bottom of the glass.  Being gritty and all, you might imagine that it would be too abrasive to scrub your teeth with, but it isn’t.  The clay is highly absorbent and any grit turns soft on contact.  Studies show that it actually helps harden tooth enamel through remineralization;  I found more than one person claiming that it had completely repaired not only their enamel but large cavities as well.

Although most commonly used for internal applications, I also started applying a thick paste of it to the distressed area that I would let dry and tighten and pull like a face mask might.  This was why I’d purchased Terramin in the first place.  I’d read that the negative charges on the clay give it the ability to adsorb or attract positively charged toxic matter like a magnet.  It seemed perfectly suited to ridding my body of what I thought was the ruptured cyst.  After just four days the affected area was reduced to a third of its former size.  It was indeed drawing together and pulling outward!  I used clay for the eight days preceding my visit to the doctor, and every day both reduced and condensed the lump.

Fast forward to after surgery.  Now we know that what we thought was a subcutaneous rupture was really a quickly growing tumor, spreading – and we know that we watched the Terramin Clay reverse the process before our eyes! Even the surgeon reports that the tumor turned out to be surprisingly self-contained, pulling away from the muscle instead of rooting down into it, which in the end was my saving grace from a much worse scenario.  So of course I think this clay deserves a study.  And a medal.  And more people getting to know it.

IMG_3530 (1024x768)

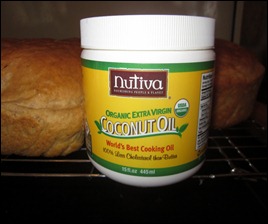
In other news to share, another product.  I don’t anticipate that will happen very often.  Nutiva Organic, Extra-Virgin Coconut Oil.  (I love their Coconut Manna, too, but that’s another story!)  I buy it in bulk, two 15 oz. containers at a time.  I keep one in a liquid stage and one as a solid and now keep my pantry in a regular supply.  When I get down to scraping the edges of the container, I move it into the bathroom shelves because it is a great thing for lips, skin and hair.

I’ve been experimenting with it in place of butter and shortening in our familiar recipes.  I even chilled it really well and made a killer pie crust for the tastiest pot pie ever, and have used it to make a healthier, hint-of-coconut caramel.  Using the solid oil in place of butter also turned out to be the final tweak to our everyday, sandwich bread recipe which I’ll share here with you in the coming weeks.  Now it is perfect in every way.  The oil adds just a faint undercurrent to the aroma and taste, but really softens the loaves without diminishing their slice-ability.  My plan is to wake-up at the start of our week and replenish the bread box with that week’s supply.  I read of a local mother who makes 16 loaves for her family every Monday morning.  My goal is 4 to 6, depending on the weekly menu.

It’s also been on my list to share with you my ricotta success.  I absolutely love ricotta but unless I find it on a great sale I usually just substitute a farmer’s cheese because it’s easily on-hand.  However, where homemade ricotta is creamy and spreadable, farmer’s cheese (like Paneer mentioned in a previous post) is crumbly and has some melt.IMG_3537 (1024x768)

I used the recipe for Fresh Homemade Ricotta at Epicurious.  The second time I made it, I didn’t have the fresh lemon juice and used a mild, white vinegar without thinking too much about it (or I would have used a stronger variety) – but it worked.  I’m planning on buying a chinois to assist in making this ricotta and soon, Greek Yogurt.  It lets you drain as much whey as possible without losing your creaminess.

If your family is anything like my family, you will savor the whey almost as much as you savor the cheese.  I will usually try to incorporate it into the same meal.  For example, if making Mattar Paneer, I will use the whey to cook the rice and lentils that go on the side.  There is nothing else like them!  Or, if making Italian, use the whey as the liquid in your bread recipe.  However, it’s also worth freezing any unused whey in pre-measured, one-cup increments.  I add it to bread or rice pudding, pancakes, hot cereal, tomato soup… I intend to keep experimenting…

Many Blessings.

Weekly Update – 2/8


We call our homestead/aspiring intentional community The Liberty Project.  I’ve called this place “Heaven” so many times since diving into our adventure last August that I’m starting to think this blog has just been waiting for me to get here!

IMG_3501 (1024x768)Last night we enjoyed the lovely Full Moon in Leo.  Here on the 49th parallel I’m feeling quite happy to see her rise up above the treetops once again!

To honor the Leo-Moon I decided to try something bold and expressive, that I’d never made before.  Roasted grapes!  I’d noticed a trend toward the ingredient and had saved several recipes to try.  In the end I went with a roasted grape, goat cheese, and honey pizza that I adapted from this bruschetta recipe.  Roasted chicken with thyme, lemon, onion and grape adapted from this recipe.  And a sauce for the chicken that I made from the other roasted ingredients pulsed through the blender, white wine, a tablespoon of apricot preserves and a touch of honey.  Spectacular is a good way to describe the meal – just like the Leo Moon!

I also tried an experiment.  For the grapes roasted with the chicken (that I knew would be made into sauce) I used canned grapes instead of fresh.  Canned grapes?!  Why, yes!  You see, back at the end of Fall, after the sweet and savory jams, I canned the last of our grapes – 7 quarts – using an Amish method I’d read about.  Just to try it and see.  That is, the grapes are left whole and kept minimally processed, canned in a water bath and nothing more.  Although most sources report that grapes aren’t so good for canning in this way, I could see how they would fit nicely into our repertoire if it worked out and thankfully we’ve loved them!  I’m going to can grapes again next year, too!  When I open a quart, I strain off the liquid, mix it with just a bit of agave or honey, and pop it into the freezer for an after-dinner grape-ice treat.  Because of the grape’s softness, the seeds are quick to pop out, if they haven’t  already released themselves, and in specific applications they are perfect.  I’ve used them to make a  grape syrup for peanut butter French toast and a grape cake dessert, among other entirely successful ventures.IMG_3523 (1024x768)

The night before the Full Moon we brought home our new doggie, Sara.  Her mother is a purebred Rottweiler and her father, pure Black Lab.  She was born the day after my husband’s birthday back in the first week of November.  We first learned of Sara’s existence on the Winter Solstice, when she was for sale for $200.  My DH had an overwhelming feeling about her; he had long expressed the desire to cross paths with a Rott-mix puppy.  Yet we’d only talked about coming across a rescue (we watch Petfinder.com), and never buying.  On a whim he gave Sara’s seller our number and we left it at that.  Then on the weekend we were surprised with a phone call saying that Sara’s new owner couldn’t give the puppy the attention she needs and that we could have her if we picked her up by Monday, when she was being taken to the shelter.  She’s housebroken and proving to be really smart and great with the kids!

Also in this last week I guess you could say that I’ve been exploring my love for cheese.  This was originally inspired by my addiction to Mattar Paneer and the realization that like everything else, I could make the dish more often for less money and with better quality if I made the Paneer (cheese) myself.  My final product (And I got to choose the source of the milk and it cost less than $2 for a pound.):

IMG_3511 (1024x809)

This has led me to start delving into other simple cheese recipes like this and this.  And exploring the idea of waxing cheese to store it in the pantry.  I can’t wait to find a great sale on cheese just to try it out!  I’ll let you know how it goes!

The Northwest Vegetarian Cookbook

My son is a Page at the local library, and brought The Northwest Vegetarian Cookbook home for me the day it was put into circulation.  He almost skipped it due to its lack of interior gloss, but I’m so glad he didn’t!

If you are a vegetarian living in the Pacific Northwest this is a must have book, for all its insight into local products, traditions and seasons of harvest.  The only thing that could make the book better is if its pictures were in color and included some shots of finished products.

If you are a vegetarian living elsewhere and simply want to indulge in some of the 200 recipes from Oregon and Washington, than this is also your book!  The Pacific Northwest produces a wondrous bounty of unique ingredients!

Last night my family enjoyed the Wild Mushroom Soup with Sherry, using the Garlic-Mushroom Stock recipe also found in the book, and it was superb just like everything else we’ve tried!  And after this, I’m sending the Bake Bean with Hazelnut Bread recipe to my Step-Dad!

Nutrition Data for any Ingredient or Recipe

Know what you are eating!  NutritionData.com has been around for almost 7 years, but I only recently rediscovered it while tiding up my bookmarks.  Since last I was there, it has been acquired by Condé Nast Publications and gained several handy “Nutrition Management Tools” developed, according to the site, to provide “the most comprehensive nutrition analysis available and to make it accessible to all”.  For me, the feature to analyze my own recipes is the coolest!  It is simultaneously more straightforward and more evolved than others I’ve used!!  There is also a nifty tracker to monitor your daily nutrient intake, if you are so inclined!  The source for the data on each individual item is provided in the footnotes of that item’s Nutrition Facts Page, which is appreciated!

RECIPE: Ginger Peach Tofu Dinner

The origin of the Cultivating Heaven blog was my blog, Heavenly Cooking, where I collected and commented on my family’s favorite Vegetarian and Vegan meals.  I’ve been into a Veggie lifestyle throughout various spans of the past 17 years and raised my two-oldest children as Vegetarians back when few around me had heard of such a thing.  In 1995 I even managed to have one of my recipes featured in Vegetarian Times, which gave me confidence in my ability to prepare delicious Veggie cuisine.

But what I admittedly didn’t understand was that Veggie doesn’t automatically equate with healthy.  I was conscious of protein in-take and organic when we could afford to be,  there were times when I even grew a good portion of what we ate, but I didn’t start grasping “Healthy” until about two years ago.  That’s when I started experimenting the Alkaline diet and incorporating raw foods that weren’t just straight from earth and vine, but actual compositions of raw ingredients.  I deleted my old way of doing things and started this blog.  And although I recently expanded Cultivating Heaven into a vessel that holds more than just a single aspect of my life, I still intend to share stellar recipes on occasion.

Case in point.  The other night I made what my DH calls “the best tofu he’s ever ate”.  That’s saying a lot because we love tofu at my house!  In fact, DH still raves about the teriyaki tofu I served him the first night we met!  I call this stellar because it’s both healthy and crazy-delicious!!

[NOTE: INGREDIENTS ARE LISTED IN THE ORDER USED; SOME INGREDIENTS APPEAR MORE THEN ONCE ON THE LIST]

INGREDIENTS:

*     1 15 oz can or 2 cups cooked chickpeas, drained

*     2 tablespoons olive oil (best if cold-pressed)

*     1 teaspoon real salt or Celtic sea salt

*     1 teaspoon chipotle powder

*     juice of ½ lemon

*     8 oz. extra firm tofu, drained but not pressed

*     1 tablespoons ginger pulp

*     1 tablespoon sesame oil

*     1 tablespoon tamari or Braggs

*     2 teaspoons sirachi

*     1 tablespoon coconut oil

*     1 large sweet onion, diced

*     1 teaspoon real salt or Celtic sea salt

*     1 cup peaches, fresh or frozen

*     ½ cup water

*     2 tablespoons honey

*     1 tablespoon ginger pulp

*     2 teaspoons sirachi

*     ½ teaspoon real salt or Celtic sea salt

*     1 tablespoon organic sherry

*     juice of ½ lemon

*     1 large roasted red pepper, diced

*     3 green onion, thinly sliced

*     several tablespoons raw almonds, thinly sliced

*     prepared brown rice or a light quinoa

DIRECTIONS:

  1. Preheat oven to 400°.
  2. While the over preheats, rinse and dry chickpeas with a towel.  Spread them into a single layer on a baking sheet and drizzle with the olive oil.  Evenly sprinkle on the salt and chipotle powder.  Squeeze the juice from ½ the lemon over the oiled and seasoned chickpeas.  Set aside.
  3. Next, get the tofu ready to put into the oven with the chickpeas.  Usually I press my tofu well, but not for this recipe.  This allows it to have the same baking time as the chickpeas without drying out.  Just put the whole tofu block into a small baking dish.  Put the designated quantities of ginger, sesame oil, tamari and sirachi on top of the tofu.  Using the back of a spoon, rub it all together and then down the sides.  Flip over, and then over again, so that the mixture is generally spread around.  This dish has several steps, so make it easier on yourself by taking short cuts like this.
  4. Put both the chickpeas and the tofu into the preheated oven for 45 minutes.
  5. While these are cooking, melt the coconut oil in a skillet and get your onions sautéing.  Don’t forget to salt them.
  6. While the onions are working toward the right translucency, start the ginger-peach sauce.  I used peaches I’d frozen from the summer glut.  They were already peeled and halved, and I didn’t bother to break them down any further.  After they’ve cooked awhile a few good mashes with a steel or wooden masher will sauce them just fine!   Just pour the water over the peaches, toss in the honey, ginger, sirachi, and salt, give it a few stirs, and bring it up to a low-simmer.  You’ll want this to simmer for at least 30 minutes.
  7. When the onions just start to stick, deglaze the skillet with the sherry.  Cook 1 to 2 minutes more or until any liquid is more of a sauce-like consistency.  Remove from heat and set-aside.
  8. When your chickpeas and tofu are out of the oven, give the peaches a few good mashes, if they require it.  Add in the juice of ½ lemon, roasted red peppers, and the sautéed onions.  Heat through.  As this is heating, cut tofu into cubes.  It will be hot but shouldn’t require much handling.
  9. To serve: Make a nice mound of rice or quinoa in a bowl or on a plate.  Top with a portion of the tofu.  My family is seven strong, so I divide the tofu into 8 portions, leaving a portion for my DH’s lunch the next day.  Cover the tofu portion with several tablespoons of the ginger-peach-veggie mixture.  Garnish liberally with roasted chickpeas, green onion slices and a generous spoonful of almonds.  AMAZING!!

Tangy BBQ Sauce

I serve this on Boca Burgers topped with a slice of melted Munster, or use it in place of Asian-spices when making Baked Tofu.  However, if you happen to be a meat eater this is a great tenderizing sauce that requires no marinating time and bakes wonderfully-thick.

INGREDIENTS:

* 4 tablespoons organic butter

* 1 tablespoon vegetarian Worcester sauce

* 1 tablespoon rice wine vinegar

* ½ tablespoon ginger pulp or finely grated

* 2 teaspoons Braggs

* 1 teaspoon salt

* 1 teaspoon ground mustard

* ¼ teaspoon fresh ground black pepper

* the juice of ½ of a medium-sized lemon

* 1/3 cup or equivalent of your favorite sweetener, such as a natural brown sugar

* 3 cloves garlic, minced

* 1 cup organic ketchup

DIRECTIONS:

1.      Melt butter in a saucepan.

2.      Mix in remaining ingredients up to (but not including) the ketchup, whisking to incorporate.  Simmer on medium-low five minutes.

3.      Whisk in ketchup.  If the sauce will be baked in the oven as part of a dish it is ready to use.  If the sauce will be used as a condiment, then continue simmering for approximately 30 minutes.

4.      Serve and Enjoy!

5.      VARIATION:  This is also great with the addition of ½ of a sweet onion, minced; Or try omitting the mustard for more of an Asian inspiration!

Baked Sweet Potato Burritos

When making these for my family of seven I double the recipe and serve alongside rice and avocado wedges served on a bed of lettuce and sprinkled with lime juice and salt… addictive!

INGREDIENTS:

* 2 medium sweet potatoes, peeled

* 2 tablespoons of your favorite vegetable oil or alternative (I used 100% Safflower Oil)

* 1 tablespoon olive oil

* 1 sweet onion, chopped

* 3-5 cloves of garlic, minced

* 1 can of black beans, drained

* 2 tablespoons taco spice blend (I used a bulk mix that includes chili powder, cumin, dried onion, and cayenne)

* ½ tablespoon Braggs

* ½ teaspoon real salt

* ½ bunch of cilantro leaves, pulled from the stems

* 4-6 whole wheat tortillas or wraps

* 4 oz. cheddar cheese, shredded (optional)

* 1 tablespoon more of your favorite vegetable oil or alternative

* sour cream (optional)

* salsa (optional)

DIRECTIONS:

1.      Put your sweet potatoes in a pot of water and boil until tender, about 30 minutes.  While your potatoes boil, proceed.

2.      Select a cookie sheet large enough to hold 4 to 6 burritos and coat it with the two tablespoons of vegetable oil.  Set aside.

3.      Sautee the onion and garlic in the olive oil until the onion is translucent.  Turn off the heat but leave on the burner.  Add the black beans, spices, Braggs, salt, and cilantro.  Stir to incorporate all ingredients.

4.      Start the oven preheating to 400°.

5.      Drain the sweet potatoes and coarsely mash.  I use a masher with large, square holes so they come out pretty much cubed.

6.      Fold the sweet potatoes into your black bean mixture.  Divide into portions based on the number of tortillas you’ll be using.

7.      Place a bit of cheese, if using, into the center of a tortilla, top with one portion of the filling, and wrap burrito-style so both ends are closed.

8.      When all the burritos are made and laid out on the cookie sheet, lightly brush them with the last tablespoon of oil.

9.      Bake 30 to 45 minutes, until desired level of golden.

10.   Rest five minutes (the filling gets extremely hot and is rather slow to cool).

11.   Serve topped with sour cream and salsa.  Enjoy!

Savory Blueberry Sauce

I’m not sure why but I’ve been on a sauce kick of late, and this has become a family favorite.  I originally served this sauce over salmon steaks that were seated on a bed of raw spinach.  Since then I’ve served it over savory corn cakes, flax pancakes, asparagus, Brussels sprouts, raw spinach, and used it to throw together a chicken-pasta-greens salad – all with great results!

INGREDIENTS:

* ½ cup vegetable stock

* ½ cup blue juice, preferably one that includes blueberry (I use Bolthouse Farms Bom Dia Acai with Blueberry)

* 1/8 cup balsamic vinegar

* 1 teaspoon or equivalent of your favorite sweetener

* 1 cup of fresh blueberries (optional)

* 1 tablespoon cold-pressed olive oil

* 1 tablespoon Mochiko

* 1 teaspoon real salt

* 1/8 teaspoon fresh ground pepper

DIRECTIONS:

1.      Put the first four ingredients in a saucepan and bring to a boil.  Reduce heat to medium-low and simmer until the sugar is dissolved and the strong vinegar smell begins to dissipate.

2.      Mix in blueberries, if you’re using them, and give them a mash or two to burst some of the berries.  Stir in the olive oil.  Simmer on low, uncovered for 30 minutes.

3.      Remove from heat.  Immediately add Mochiko, salt, and pepper.  The sauce will quickly thicken.  Serve.

Savory Lemon Sauce

This sauce is great on Salmon steaks or patties!  We’ve also enjoyed it on Asparagus as it can be used as an easy substitute for Hollandaise!

INGREDIENTS:

* 4 tablespoons organic, all-natural butter

* 1 ½ tablespoon Mochiko

* ¾ cup half-and-half or milk

* 3 tablespoons lemon juice or approximately the juice of ½ a lemon

* 1 teaspoon real salt

* ¼ teaspoon chili powder

DIRECTIONS:

1.      Melt butter in a saucepan.  Sprinkle Mochiko over melted butter and stir.

2.      Slowly add half-and-half to make a smooth sauce.

3.      Stir in lemon juice, salt, and chili powder.  Blend well.  Heat through, stirring often.  Serve.

4.      If sauce becomes too thick thin it out with a bit more half-and-half or even a dash of water.

5.      If you want a taste more like Hollandaise, omit the chili powder and use a few dashes of Worcestershire in its place.  Note that the sauce will no longer be vegetarian if using Worcestershire.